
3 Quick Checks to Fix Your Webcam on Windows 11, Backed by Technicians

Most of the time, a webcam not working on Windows 11 comes down to three things, in this order: camera privacy toggles blocking access, a driver that needs updating or reinstalling, or an app conflict stopping the feed. Open Settings > Privacy & security > Camera and switch on “Let desktop apps access your camera.” Then open the built-in Camera app to see if the hardware itself responds. If the picture’s still black, run the Camera troubleshooter and restart before touching drivers.
TL;DR:
Most webcam issues stem from privacy toggles or software conflicts, not hardware failure, so checking permissions and app-specific settings first is crucial.
Testing the camera in the built-in app before making driver changes quickly determines if the fault is system-wide or app-specific, saving time.
External webcams should be connected directly to powered rear ports with good cables, as loose connections or faulty hubs are common causes of detection problems.
When permissions and basic troubleshooting fail, updating or reinstalling drivers from the manufacturer’s site is the next step, especially for specialized MIPI camera modules.
Persistent failures after confirming permissions and driver updates likely indicate hardware faults, warranting professional inspection or repair.
Table of Contents
How do I fix a webcam not working on Windows 11?
Work through these checks in order. Each one takes a couple of minutes, and most people find the fault within the first four or five steps.
Restart your device and close conflicting apps. Camera hardware on Windows 11 can only be used by one application at a time. If Teams, Zoom, or a browser tab already has the camera open, close all of them, restart the PC, and try again with just one app running.
For external webcams, swap the USB port and cable. Plug the webcam directly into a rear USB port on the tower or a port on the laptop itself, not through a monitor’s USB pass through or a cheap hub. Loose connections and underpowered hubs are a common, boring cause of a webcam not detected error.
Check the Windows privacy toggles. Go to Settings > Privacy & security > Camera and confirm the master “Camera access” switch is on, along with “Let desktop apps access your camera.” Miss either one and the camera can show as fine in Device Manager while every app reports it as missing.
Test the camera in the Camera app before touching anything else. This is the step Microsoft’s own troubleshooting guidance leans on hardest, and for good reason. If the built-in Camera app shows a live picture, the hardware and drivers are working, and the fault sits with a specific app or its permissions. If Camera app is also black, the problem is deeper, either drivers or the device itself.
Run the built-in Camera troubleshooter. Head to Settings > System > Troubleshoot > Other troubleshooters and run Camera. It checks driver status and service errors automatically and can fix minor faults without you touching Device Manager at all.
Temporarily disable third-party antivirus webcam protection. Some security suites, including certain builds flagged in Microsoft Q&A reports about webcam blocking, quietly block camera access for specific apps as a “protection” feature. Turn it off for five minutes and retest before deciding drivers are the culprit.
Update, roll back, or reinstall the camera driver in Device Manager. Open Device Manager, expand Cameras, right-click the device, and try “Update driver” first. If the fault appeared right after a Windows update, roll back instead. If neither works, uninstall the device (tick “delete driver software” if offered) and restart. Windows will usually reinstall it automatically.
If the device still isn’t detected, check for a physical shutter or kill switch. Some laptops have a sliding shutter over the lens, and many use a function key combination as a hardware toggle. If none of that applies and the camera has vanished from Device Manager entirely, it’s worth booking a technician rather than guessing further.
Pro Tip: Test in the Camera app before you open Teams or Zoom, every single time you’re troubleshooting. It takes ten seconds and tells you instantly whether you’re chasing an app problem or a system problem, which saves you from reinstalling drivers when the real issue was a Zoom permission setting.
Repair technicians report that most webcam faults trace back to privacy settings or software conflicts rather than a dead sensor, which is exactly why this order starts with toggles and ends with hardware.
Why do Windows 11 permissions block your camera?
Windows 11 stacks camera permissions in layers, and missing any single layer produces the same blank screen regardless of what’s actually wrong. This layered model is genuinely the most confusing part of the whole system for most users, and it’s the reason so many people wrongly conclude their hardware is dead.
There are four layers to check, and they sit in a specific order:
Global camera access — the master switch in Settings > Privacy & security > Camera. If this is off, nothing on the device can use the camera, full stop.
Let desktop apps access your camera — a separate toggle underneath the global one. Microsoft Store apps and traditional desktop programs (like the desktop version of Zoom) are governed differently, so this second switch exists specifically for legacy Win32 software.
Per-app permission — scroll further down the same Camera settings page and you’ll see a list of individual apps, each with its own on/off switch. Teams can be allowed while Zoom is blocked, and vice versa, with no obvious reason unless you check this list directly.
Browser site permission — if you’re joining a call through Chrome, Edge, or Firefox rather than a desktop app, the browser has its own camera permission for that specific site, sitting entirely outside the Windows settings.
Microsoft’s own testing of privacy controls for desktop app camera access confirms this split between Store apps and desktop apps is deliberate, not a bug, which explains why fixing one toggle sometimes isn’t enough.
A quick reality check: Device Manager can report a camera as “working properly” while every one of these four layers still blocks the feed. That’s the single biggest source of false hardware diagnoses among home users, and it’s worth ruling out before you spend money on a repair.
Run through the checklist in this order, every time: global toggle, desktop apps toggle, per-app toggle, browser site permission. Whichever layer is off, that’s your fix.
Why isn’t Zoom picking up my camera or mic?
Meeting apps add their own permission layer on top of Windows, which is why a camera that works fine in the Camera app can still fail the moment you join a call.
Pick the right camera device inside the app. Both Teams and Zoom let you select which camera to use from a dropdown in settings, and if a laptop has more than one camera listed (common on machines with an IR sensor for Windows Hello), the wrong one might be selected by default.
Use the built-in test feature before joining a real call. Zoom’s settings menu has a “Test video” option, and Teams has a device check under settings, both of which show a live preview so you can confirm the picture before anyone’s watching.
Check browser site permissions if you’re on a web version. In Chrome or Edge, click the padlock icon next to the address bar, find Camera and Microphone, and make sure both are set to Allow rather than Block. Firefox keeps the same setting under the same padlock icon.
Close the Camera app or any other program holding the device. If another app has the camera open, Zoom and Teams will simply show a black box with no error message, which is a frustrating one to diagnose blind.
Sign out and back into the meeting app if the picture still won’t load. This resets the app’s internal session and often clears a stuck permission handshake with Windows.
Clear the app’s cache or reinstall it if the Camera app preview works fine but the meeting app still fails. A corrupted local cache is a common, quiet cause of “zoom no one can hear me” and matching video faults that no permission toggle will fix.
If audio is the problem rather than video, run through the same four permission layers for the microphone; a mic not working on Zoom nearly always traces back to the same global, per-app, or browser toggle mismatch as a mic not detected error for video calls.
How do you safely fix camera drivers in Device Manager?
Driver issues sit one level below permissions in likelihood, but they’re the next place to look once you’ve confirmed every toggle is switched on correctly.
Open Device Manager and expand Cameras (also check “Audio inputs and outputs” if the microphone’s affected too). Look for a yellow warning triangle or a down arrow icon on the device, either of which flags a driver problem immediately.
Try “Update driver” first, right click on the device and choose “Search automatically for drivers.” This pulls from Windows Update and fixes a good share of routine cases without any further steps.
Roll back if the fault started after a Windows update. If the camera worked fine last week and broke after a system update, right click, choose Properties, then the Driver tab, and select “Roll Back Driver” if that option is available.
Uninstall and restart to force a clean reinstall. Right click the device, select Uninstall, tick “Delete the driver software for this device” if prompted, then restart. Windows 11 typically detects the hardware fresh and reinstalls a working driver automatically.
Check the manufacturer’s support page for MIPI cameras specifically. Some laptop cameras use MIPI camera modules rather than standard USB Video Class devices, and these need a very particular driver sequence. Lenovo’s own support guidance for MIPI cameras on ThinkPad models is a good example: install the wrong driver, or install it out of order, and the camera won’t come back even after a clean uninstall.
Pro Tip: Skip the third-party “driver updater” tools that promise to scan and fix everything automatically. They frequently install generic drivers that are close enough to work but wrong enough to cause exactly the MIPI-style failures described above. Go to the laptop manufacturer’s own support site, search by your exact model number, and download the driver listed there.
Could it be a hardware fault rather than software?
Genuine hardware failure is less common than people assume, but it does happen, and a few clear signs point you in that direction rather than back to Settings.
A physical shutter or kill switch is closed. Some laptops have a small sliding cover over the lens, and several models use a dedicated function key as a hardware level toggle, entirely separate from anything in Windows.
The camera vanishes from Device Manager even after a clean driver reinstall. If Windows can’t see the device at all, no software fix will bring it back, and that points to a connection or component fault inside the machine.
There’s visible physical damage — a cracked lens housing, a laptop that’s been dropped, or a webcam that stopped working right after liquid contact.
Detection is intermittent, working one restart and not the next, which often points to a loose internal ribbon cable rather than anything Windows is doing wrong.
Microsoft’s Surface support guidance notes that if a camera shows as working in Device Manager but still won’t operate inside any app after checking permissions, running diagnostics, and confirming app updates, persistent failure after all of that points toward a hardware fault needing manufacturer service.
A technician’s process at this point usually involves re-seating the internal camera ribbon cable, checking firmware versions against the manufacturer’s release notes, and running vendor-specific diagnostic tools that go deeper than anything available through Settings. Opening a laptop yourself to check a ribbon cable is genuinely risky. It’s easy to damage a connector that costs far less to have professionally reseated than to replace after a DIY attempt goes wrong. If you’re at this stage, note down what you’ve already tried (driver reinstall, toggle checks, alternate ports) before booking a visit, since it saves the technician from repeating steps you’ve already ruled out.
How do you stop this happening again?
A little routine maintenance heads off most webcam faults before they start.
Keep Windows and device firmware current, and stick to official update channels rather than third-party driver tools that promise a quick fix.
Whitelist your meeting apps in antivirus software rather than leaving webcam protection on its most aggressive setting, which tends to block legitimate apps as often as it blocks anything malicious.
Keep a cheap external USB webcam or a phone-as-camera app as backup for the meeting you genuinely can’t afford to miss.
Run a thirty-second pre-call check: restart if you haven’t recently, open the Camera app to confirm the feed’s live, then pick the correct device inside your meeting app before you join.
Pro Tip: Do the Camera app test five minutes before an important call, not thirty seconds before. If something’s wrong, five minutes is enough time to run the troubleshooter; thirty seconds is enough time to panic.
NextGen IT’s perspective: what we actually find on-site
Camera faults called in as “broken” turn out to be hardware only a small share of the time. Most on-site visits end with a blocked permission, a driver installed in the wrong order, or a loose internal ribbon cable that a full software reinstall was never going to fix.
The pattern we see most often is a customer who’s already reinstalled Windows or run three different driver tools before calling. Nine times out of ten, the actual fault was a single toggle in Settings or a ribbon cable connector that had worked loose. The fix takes minutes once someone’s looked at the machine directly, but it’s nearly impossible to diagnose confidently over the phone.
That’s the reasoning behind the “No Fix, No Fee” approach: a technician checks permissions, tests drivers in the correct sequence, and inspects the internal connection before quoting anything, so you’re never paying for guesswork.
What actually matters when your webcam won’t work
The order you troubleshoot in matters more than how thorough you are. Most guides throw every possible fix at the reader in one long list, which means people jump straight to reinstalling drivers or resetting Windows entirely, when the actual fault was one toggle they never noticed on the Privacy & security page.
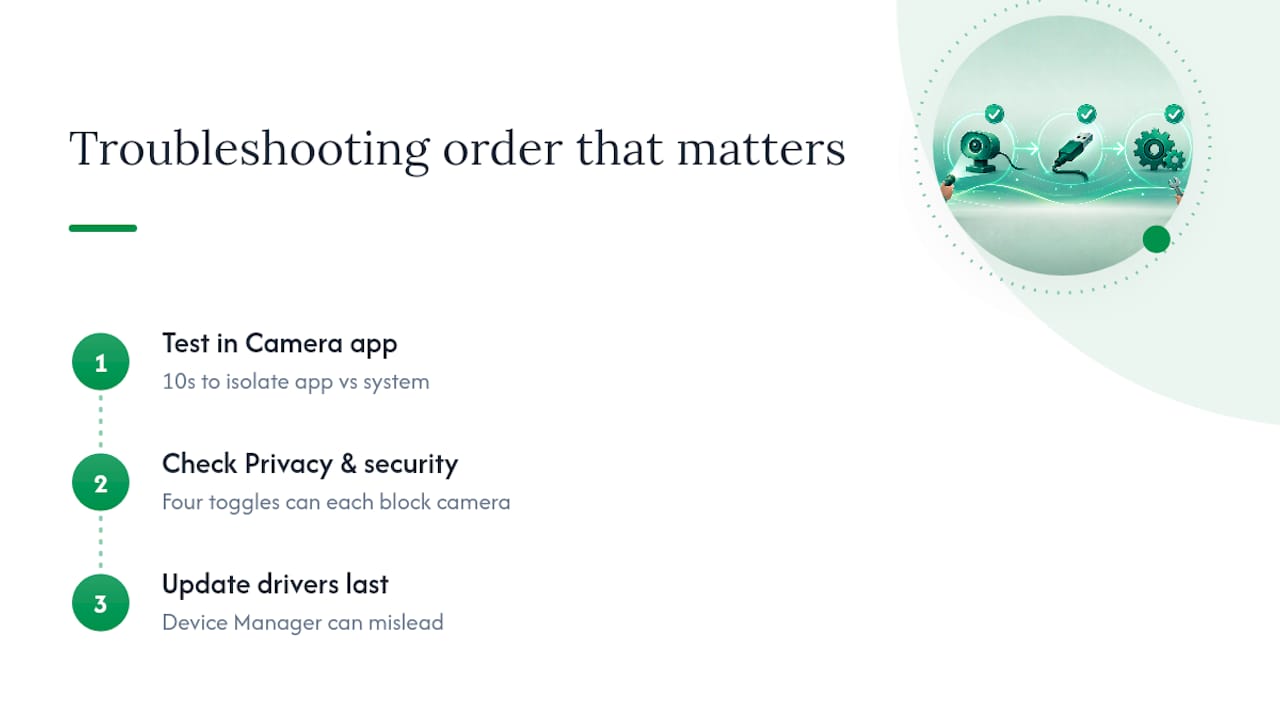
The conventional advice undersells how often the layered permission model is the real culprit. Four separate switches can each independently block a camera, and Device Manager reporting “this device is working properly” tells you almost nothing about whether any of those four are actually off. That’s not a minor detail. It’s the reason so many people conclude their camera is broken when it’s actually one checkbox away from working.
If you take one thing from this guide, test in the Camera app before you touch a single driver. It costs you ten seconds and tells you immediately whether you’re dealing with a system fault or an app-specific one, which changes everything about where you should spend your time next.
— Matthew
Book a technician for hands-on camera repairs
If you’ve worked through the checklist above and the camera still won’t cooperate, or you’d simply rather not spend an evening in Device Manager, A technician can be sent to your home to sort it on the spot. That’s the real difference from working through forum threads alone: someone physically checks the internal ribbon cable, confirms the correct driver sequence for your exact model, and sets up an external webcam if the built-in one turns out to be past saving, all in one visit.

Visits can include a No Fix, No Fee approach, so you may only be charged when the camera is working again. Before booking, jot down what you’ve already tried (privacy toggles, troubleshooter, driver reinstall) so the technician can skip straight to what’s left. Head to the Laptop & Computer Repairs page to check availability and book a same-day home visit.
Where to check for official guidance
A few primary sources back up the steps in this guide, and they’re worth bookmarking if the fault comes back later or your device model isn’t covered here.
Microsoft’s camera troubleshooting page covers the full official Windows 11 process, including the privacy toggles and troubleshooter steps.
Microsoft’s Surface-specific camera guidance walks through diagnostics for cases where Device Manager and app behaviour disagree.
Lenovo’s MIPI camera driver support page is a useful model for finding the correct manufacturer driver sequence on newer laptop camera modules.
Sources
FAQ
How do I enable my webcam in Windows 11?
Go to Settings > Privacy & security > Camera and turn on both “Camera access” and “Let desktop apps access your camera,” then scroll down and check the specific app you’re using is also allowed. Microsoft’s own guidance confirms these are the two settings most commonly left off after a Windows update.
Why is my webcam suddenly not working?
The most common causes are a Windows update resetting a privacy toggle, a driver that got corrupted during an update, or antivirus webcam protection quietly blocking access. Test in the built-in Camera app first: if the picture appears there, the fault is app-specific rather than system-wide.
Why is my PC not detecting my camera?
Check Device Manager first. If the camera’s missing entirely or shows a warning icon, try updating or reinstalling the driver, but be aware some laptops use MIPI camera modules that need a manufacturer-specific driver rather than a generic one, as Lenovo’s support documentation explains for its ThinkPad range.
Why is my webcam not showing up on my PC?
A camera that doesn’t appear anywhere in Windows, including Device Manager, usually points to either a physical kill switch that’s engaged or a hardware connection fault inside the laptop. If a full driver reinstall doesn’t bring it back, that’s a strong signal to book an in-home technician rather than keep troubleshooting.
When should I call a technician instead of troubleshooting myself?
Book a visit once you’ve confirmed the privacy toggles are on, tested in the Camera app, and tried a driver reinstall without success, particularly if the camera has disappeared from Device Manager entirely. Nextgenit offers on-site diagnostics under a No Fix, No Fee guarantee, so you’re not paying unless the camera actually gets fixed.
Recommended
Comments